USB drive would be write protected for some reasons. To keep the data from virus infection, some users will enable the write protection for USB drive. Also, you can avoid unintentionally data deletion on the USB drive. If there are some issues happen, the USB drive would also be changed to write protected. If a USB drive becomes write protected, do you know how to remove write protection from USB in Windows 11/10/8/7? This article will lead you to do the job with some methods.
- Part 1: How to check if the drive is write protected?
- Part 2: Remove write protection from USB in 4 ways
- Part 3: Recover data from write protected USB drive
Part 1: How to check if the drive is write protected?
It’s not able to write or change any data to a USB drive, like adding, removing, editing operations. If you find there following issues to a USB drive, it should be write protected.
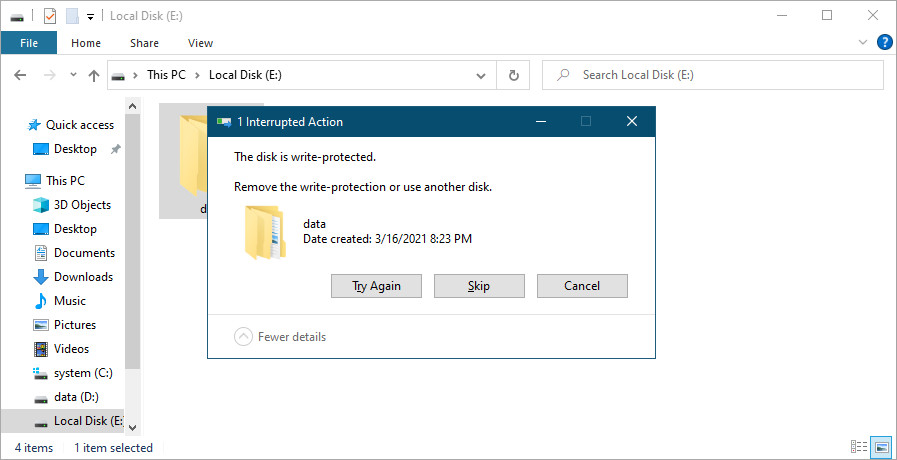
If you copy data from another place and try to paste to the USB, it’s not able to finish the operation. You will receive the prompt message “The disk is write-protected”. You are not able to paste the files unless you remove write-protection.
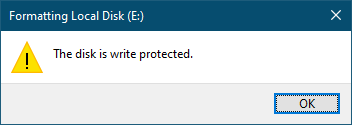
When you try to format a USB drive, it will give you the following information while formatting. In such a case, you are not able to format the drive successfully.
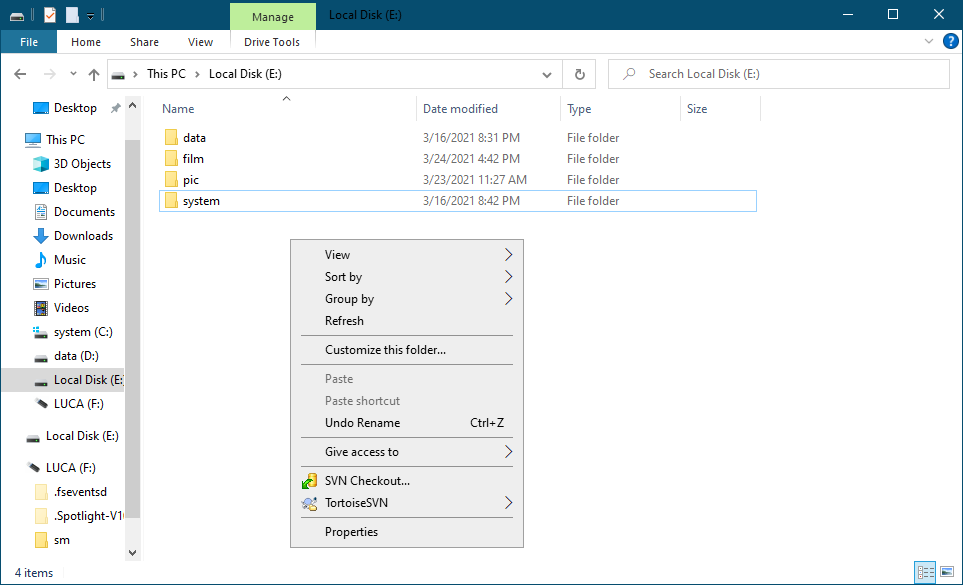
On a write protected USB drive, you will not find “New” option in the right-click menu. If you right-click a file or folder, you also cannot find “Delete” option. What’s more, if you open a file and edit it, it’s not able to save the file directly on the same drive. It will ask you to save to another drive.
Part 2: Remove write protection from USB in 4 ways
To remove write protection from USB flash drive or USB drive, there are some solutions you can try as follows.
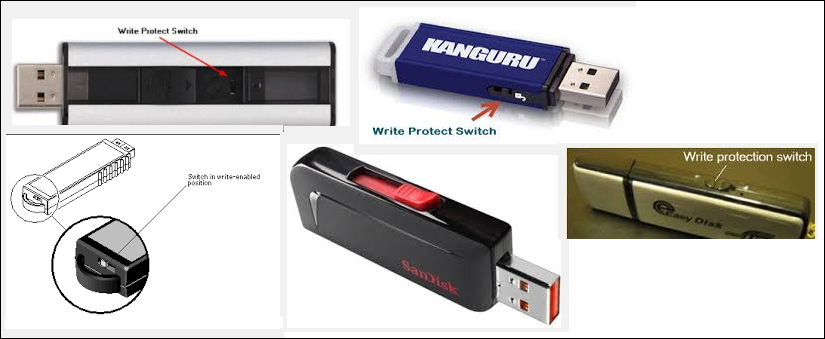
Method 1. Check the switch for USB flash drive.
Some USB flash drives offer the write protection switches directly. If you have such a USB flash drive, you can easily turn on or off the write protection for it directly. You can check and just turn off it to remove the write protection.
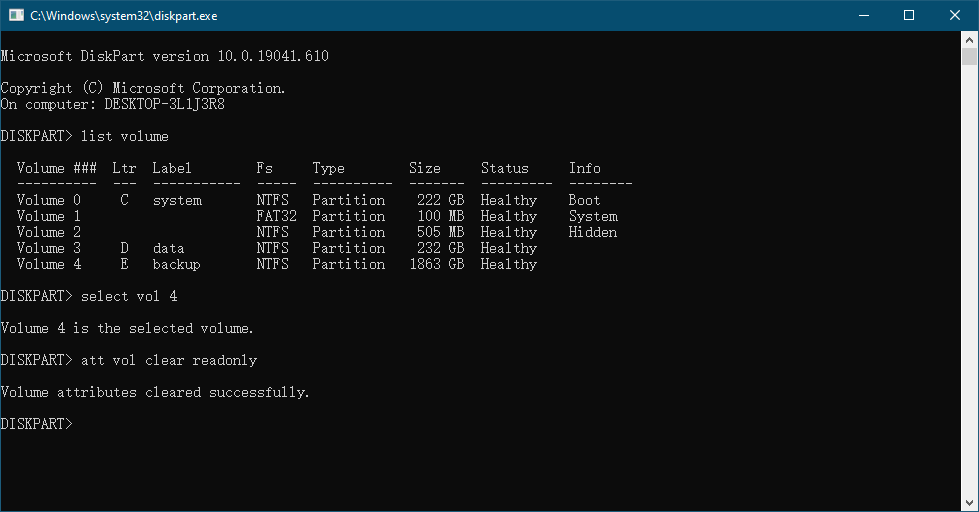
Method 2. Remove write protection in DiskPart.
There is another way to remove write protection. If your USB drive become write protected, you can use DiskPart tool to remove the read-only property. It will also help you remove write protection for USB drive.
Click Win + R, type in diskpart to open DiskPart tool.
Type in the following commands to remove the write protection.
list volume
select vol 4
att vol clear readonly
Note: vol 4 is the write protected volume. Please ensure to enter the correct one in your own case.
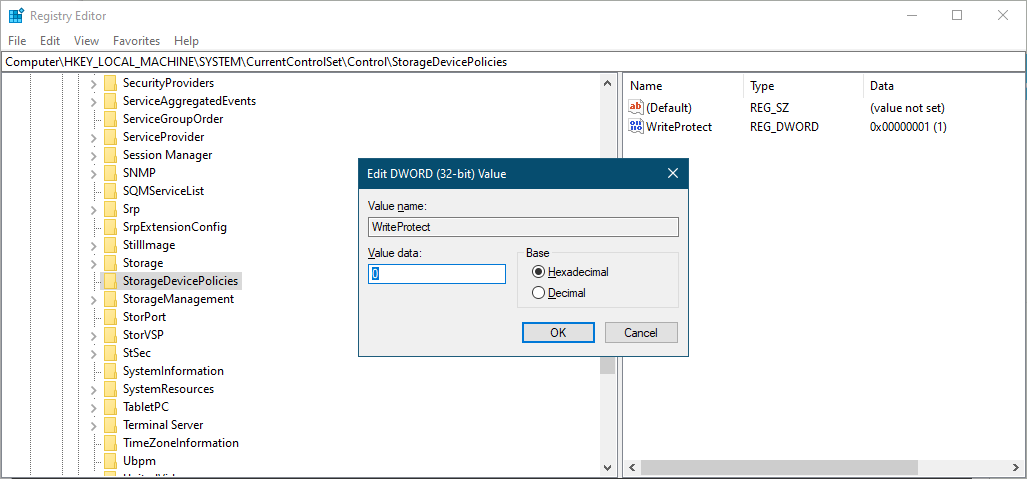
Method 3. Change Registry to remove write protection.
You can also change the registry key value to remove write protection for USB drive. Click Win + R key and enter regedit to open Registry Editor. Go to the item:
HKEY_LOCAL_Machine\SYSTEM\CurrentControlSet\Control\StorageDevicePolicies
Then in the right panel, please right-click the key WriteProtect >Modify. Change the value to “0” and click OK.
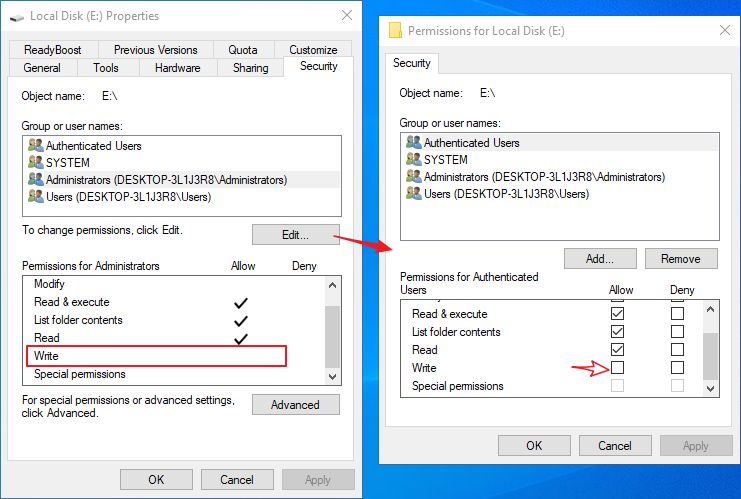
Method 4. Change the write permission for specific user account.
If the current user account cannot write to the drive, you can also change the permission settings for the drive. Right-click the USB drive > Properties > Security, you can check if the current account doesn’t have the write permission to the drive. If so, you can click the Edit... button to change it. In the pop up window, please choose the user account and enable the write permission directly.
Part 3: Recover data from write protected USB drive
If a drive become write-protected and the above methods cannot work to remove the write protection, you can still try to extract and remove the files. If the files on the drive is accessible, you can copy them and paste to another drive directly.
If you ever deleted or lost some files from the drive before it become write-protected, you can still try to recover the deleted/lost files from the drive. We suggest you download and use TogetherShare Data Recovery to help you.
TogetherShare Data Recovery
Powerful & easy-to-use data recovery software
The software is able to search for the write protected drive and recover lost data from it. It’s able to recover different types of files, including pictures, documents, audio files, video clips, and more.
The software is very simple to use. With only a few clicks, you can easily get back the lost files from write protected USB drive. Here is a short guide for you:
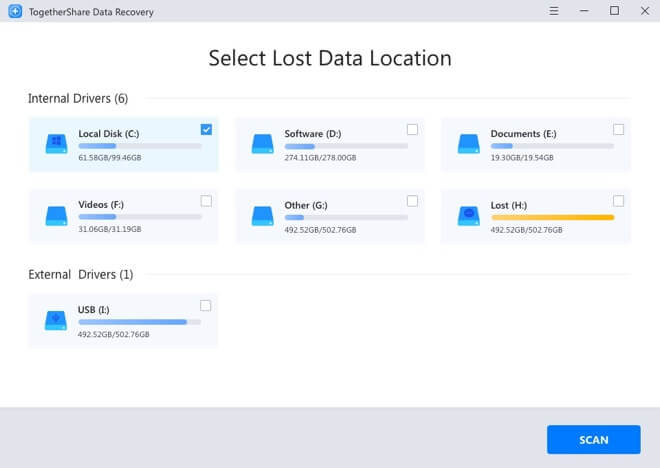
Step 1. Connect the write protected USB drive to the computer. Start the data recovery software and choose the write protected USB drive.
Step 2. Please click the Scan button directly. The software will then deeply scan the write protected USB drive to look for the lost files on the drive.

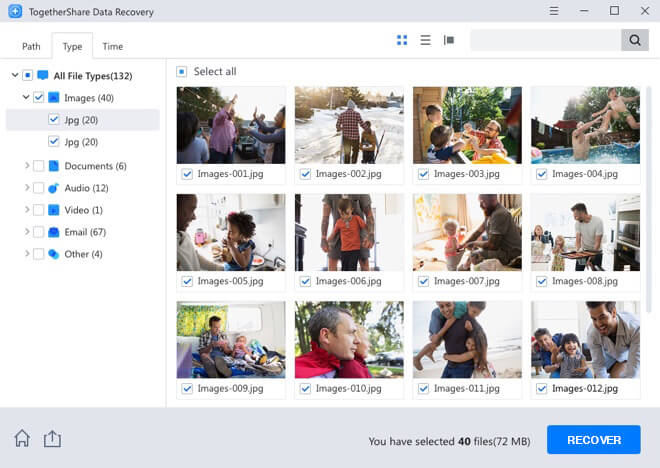
Step 3. After the scan is completed, please check carefully to find the desired data. Choose the wanted files and click Recover button to save the files to another drive.
Besides write protected USB drive, TogetherShare Data Recovery can also recover lost data in other cases in Windows 11/10/8/7. For instance, it can recover deleted/formatted data, lost data from hard drive, SSD, USB flash drive, memory card and other devices. Should you need to recover lost files in Windows10/8/7, you can download this reliable software and have a try.
TogetherShare Data Recovery
Powerful & easy-to-use data recovery software